Instant Pot Creamy Garlic Parmesan Chicken Pasta is the ultimate answer to those busy weeknights when you need a delicious, comforting meal on the table fast. This recipe delivers on flavor and convenience, transforming simple ingredients into a rich and satisfying dish that the whole family will adore.

Forget multiple pots and endless cleanup; this one-pot wonder is designed for efficiency without sacrificing taste. The magic of the Instant Pot brings together tender chicken, perfectly cooked cellentani pasta, and a luscious garlic parmesan cream sauce in record time, making it a staple for any home cook looking for a stress-free dinner solution.

Instant Pot Creamy Garlic Parmesan Chicken Pasta
- Total Time: 30-35 minutes
- Yield: 4-6 servings 1x
Description
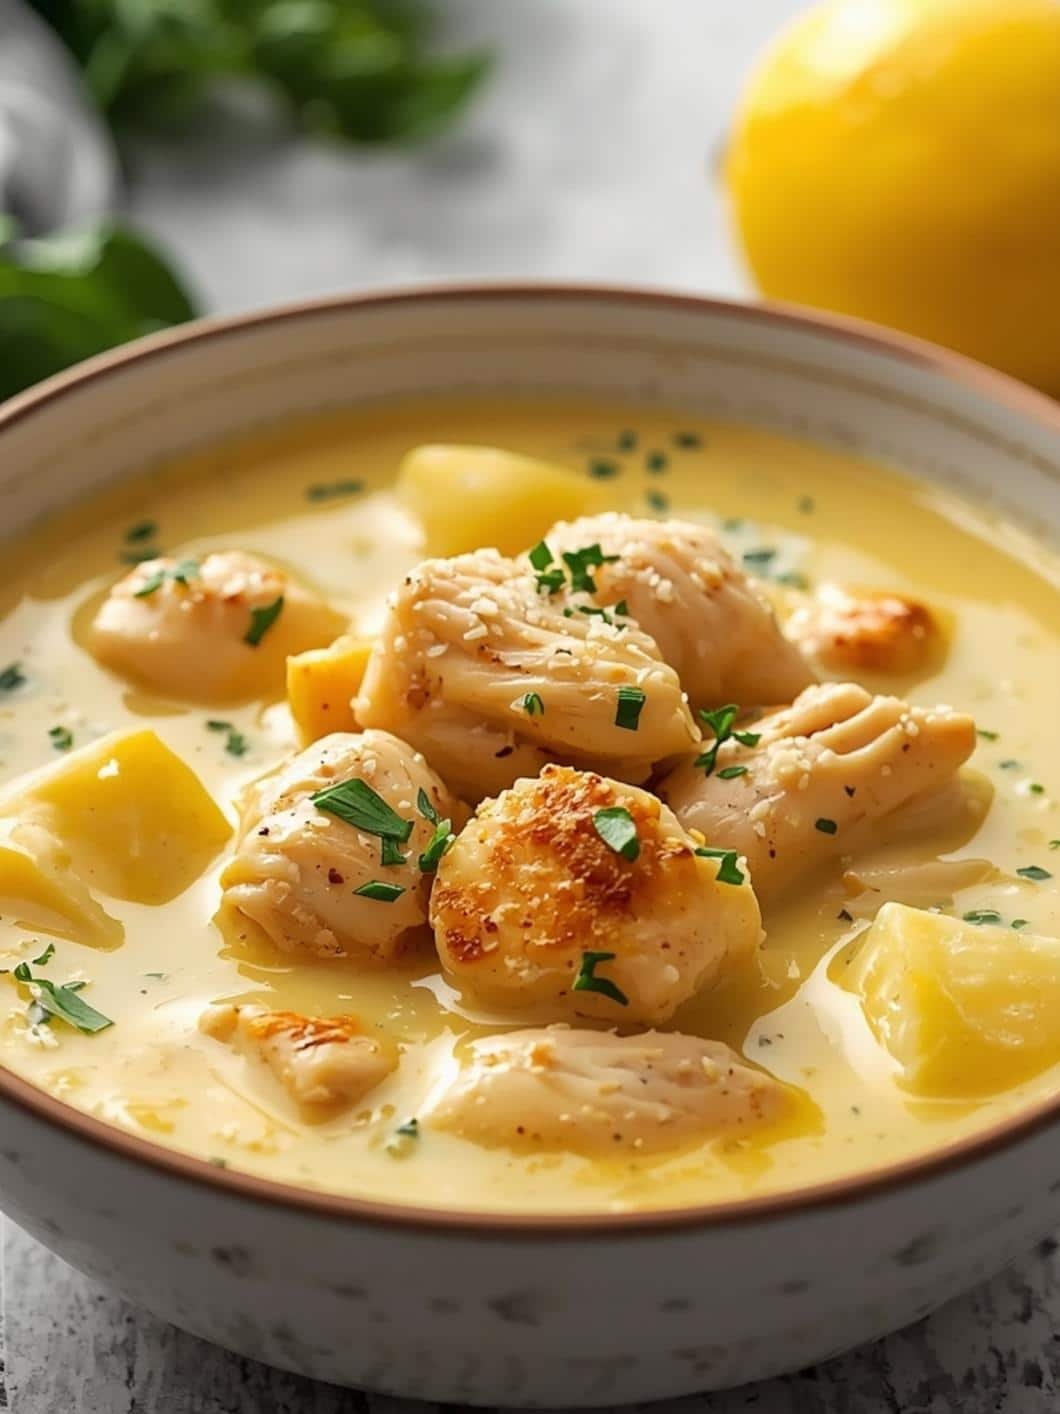
This Instant Pot Creamy Garlic Parmesan Chicken Pasta is a quick and easy one-pot meal that delivers rich flavor and convenience. Tender chicken, perfectly cooked cellentani pasta, and a luscious garlic parmesan cream sauce come together in record time, making it a perfect solution for busy weeknights and a family favorite.
Ingredients
Instructions
1. Set your Instant Pot to the “Saute” function and add the olive oil. Once hot, add the cubed chicken breasts seasoned with garlic powder, onion powder, Italian seasoning, salt, and pepper. Cook, stirring occasionally, until the chicken is lightly browned on all sides, about 4-5 minutes. It doesn’t need to be cooked through at this stage.
2. Stir in the minced garlic with the chicken and continue to saute for another minute until fragrant. Be careful not to burn the garlic, as this can make it bitter.
3. Pour in 1/2 cup of the chicken broth and use a wooden spoon or silicone spatula to scrape up any browned bits from the bottom of the pot. This is a crucial step to prevent a “Burn” notice on your Instant Pot and adds extra flavor to the sauce.
4. Add the cellentani pasta to the pot in an even layer. Do not stir. Pour the remaining 2 1/2 cups of chicken broth over the pasta, ensuring the pasta is mostly submerged. Again, do not stir, as stirring can cause the pasta to stick together and prevent even cooking under pressure.
5. Secure the lid on your Instant Pot and make sure the venting knob is set to the “Sealing” position. Select the “Manual” or “Pressure Cook” setting and set the cooking time for 5 minutes at high pressure. The Instant Pot will take about 5-10 minutes to come to pressure before the cooking time begins.
6. Once the cooking cycle is complete, perform a quick release of the pressure by carefully turning the venting knob to the “Venting” position. Once all the steam has escaped and the float valve has dropped, open the lid.
7. Stir the pasta and chicken well. Add the heavy cream and grated Parmesan cheese to the pot. Stir continuously until the cheese is fully melted and the sauce has thickened to your desired consistency. The residual heat will help everything come together beautifully.
8. Taste and adjust seasonings if needed. Ladle the creamy garlic parmesan chicken pasta into bowls, garnish with fresh chopped parsley, and serve immediately with extra Parmesan cheese on the side.
- Prep Time: 10-15 minutes
- Cook Time: 10-12 minutes
- Category: main dish
- Method: pressure cooking
- Cuisine: american
Nutrition
- Serving Size: 1 serving
Keywords: instant pot, chicken pasta, creamy, garlic parmesan, one pot, weeknight meal, comfort food, easy, family friendly, quick
What You’ll Love About This Quick And Easy Recipe
This Instant Pot Creamy Garlic Parmesan Chicken Pasta is a game-changer for several reasons, making it an instant family favorite. First and foremost, its one-pot nature means significantly less cleanup, which is a huge win on any busy weeknight. Who wants to spend precious evening minutes scrubbing pots and pans when you could be relaxing or spending time with loved ones? This recipe is designed for maximum flavor with minimal effort, perfect for home cooks of all skill levels, especially beginners. The Instant Pot does most of the heavy lifting, ensuring the chicken is tender and the pasta is cooked just right, every single time.
It’s an ideal meal for families with young children or picky eaters, as the creamy, cheesy sauce and familiar chicken and pasta combination are generally well-received. The flavors are comforting and approachable, not overly spicy or exotic, making it a safe bet for a crowd-pleasing dinner. You can serve this dish after a long day at work, when you’re short on time but still crave a homemade meal, or even for a casual weekend lunch. It’s hearty enough to be a complete meal on its own, offering a balanced plate of protein, carbohydrates, and dairy. The use of cellentani pasta, with its corkscrew shape, is particularly good at holding onto the creamy sauce, ensuring every bite is packed with flavor and texture.
Everything You Need To Make This Recipe Without Stress
Gathering your ingredients before you begin cooking is a fantastic way to ensure a smooth and enjoyable experience in the kitchen. This recipe uses readily available items that you might already have in your pantry or can easily find at any grocery store. The beauty of this dish lies in its simplicity and the way a few key components come together to create something truly delicious.
INGREDIENTS:

- 1 tablespoon olive oil
- 1 pound boneless, skinless chicken breasts, cut into 1-inch cubes
- 1 teaspoon garlic powder
- 1/2 teaspoon onion powder
- 1/2 teaspoon dried Italian seasoning
- Salt and black pepper to taste
- 4 cloves garlic, minced
- 3 cups chicken broth
- 12 ounces cellentani pasta (cavatappi)
- 1/2 cup heavy cream
- 1/2 cup grated Parmesan cheese, plus more for serving
- 2 tablespoons fresh parsley, chopped, for garnish
For simple substitutions, you can easily swap boneless, skinless chicken thighs for breasts if that’s what you have on hand; just ensure they are cut into similar-sized pieces for even cooking. If cellentani pasta isn’t available, other short, sturdy pasta shapes like penne, rotini, or even medium shells would work well, as they also hold creamy sauces effectively. Just be mindful that cooking times might vary slightly for different pasta shapes, so always check for al dente doneness. Feel free to use low-sodium chicken broth if you’re watching your sodium intake, and adjust salt levels accordingly. For a touch of heat, a pinch of red pepper flakes can be added along with the garlic and seasonings.
Time Needed From Start To Finish
This Instant Pot Creamy Garlic Parmesan Chicken Pasta is truly a quick-cooking marvel, designed to get a satisfying meal on your table without a long wait. The total time commitment is surprisingly minimal, making it ideal for those evenings when every minute counts.
- Preparation Time: Approximately 10-15 minutes. This includes cubing the chicken, mincing the garlic, and gathering all your other ingredients.
- Cook Time: Approximately 10-12 minutes of active pressure cooking, plus about 5-10 minutes for the Instant Pot to come to pressure and a quick pressure release.
- Resting/Finishing Time: About 5 minutes to stir in the cream and cheese and allow the sauce to thicken slightly.
Total Time: You can expect to have this delicious, creamy pasta dish ready to serve in about 30-35 minutes from start to finish. This makes it faster than ordering takeout and significantly more satisfying!
How To Make It Step By Step With Visual Cues

Making this Instant Pot Creamy Garlic Parmesan Chicken Pasta is a straightforward process, even for beginner cooks. Follow these steps for a perfect, comforting meal every time.
- Sauté the Chicken: Set your Instant Pot to the “Sauté” function and add the olive oil. Once hot, add the cubed chicken breasts seasoned with garlic powder, onion powder, Italian seasoning, salt, and pepper. Cook, stirring occasionally, until the chicken is lightly browned on all sides, about 4-5 minutes. It doesn’t need to be cooked through at this stage.
- Add the Aromatics: Stir in the minced garlic with the chicken and continue to sauté for another minute until fragrant. Be careful not to burn the garlic, as this can make it bitter.
- Deglaze the Pot: Pour in 1/2 cup of the chicken broth and use a wooden spoon or silicone spatula to scrape up any browned bits from the bottom of the pot. This is a crucial step to prevent a “Burn” notice on your Instant Pot and adds extra flavor to the sauce.
- Layer the Pasta and Broth: Add the cellentani pasta to the pot in an even layer. Do not stir. Pour the remaining 2 1/2 cups of chicken broth over the pasta, ensuring the pasta is mostly submerged. Again, do not stir, as stirring can cause the pasta to stick together and prevent even cooking under pressure.
- Pressure Cook: Secure the lid on your Instant Pot and make sure the venting knob is set to the “Sealing” position. Select the “Manual” or “Pressure Cook” setting and set the cooking time for 5 minutes at high pressure. The Instant Pot will take about 5-10 minutes to come to pressure before the cooking time begins.
- Quick Release and Finish: Once the cooking cycle is complete, perform a quick release of the pressure by carefully turning the venting knob to the “Venting” position. Once all the steam has escaped and the float valve has dropped, open the lid.
- Create the Creamy Sauce: Stir the pasta and chicken well. Add the heavy cream and grated Parmesan cheese to the pot. Stir continuously until the cheese is fully melted and the sauce has thickened to your desired consistency. The residual heat will help everything come together beautifully.
- Serve and Garnish: Taste and adjust seasonings if needed. Ladle the creamy garlic parmesan chicken pasta into bowls, garnish with fresh chopped parsley, and serve immediately with extra Parmesan cheese on the side.
Easy Variations And Serving Ideas That Fit Real Life
This Instant Pot Creamy Garlic Parmesan Chicken Pasta is wonderfully versatile, making it easy to adapt to different tastes and occasions. Here are some simple variations and serving suggestions to make it even more perfect for your family.
For a veggie boost, consider stirring in some fresh spinach or frozen peas during the last minute of cooking or when you add the cream and cheese. The residual heat will gently cook them without making them mushy. You could also add finely diced bell peppers or mushrooms when you sauté the chicken for a more robust flavor profile. If you’re not a fan of chicken, shrimp makes a fantastic substitute; simply sauté it briefly until pink before adding the other ingredients, or cook it separately and stir it in at the end to avoid overcooking.
To make it even more kid-friendly, you can opt for smaller pasta shapes like ditalini or elbow macaroni, which are often easier for little ones to eat. A sprinkle of mild cheddar cheese along with the Parmesan can also appeal to younger palates. Serve it with a side of garlic bread for dipping into the creamy sauce – a guaranteed hit!
For a more substantial meal, especially if you’re serving a crowd, a simple green salad with a light vinaigrette makes a refreshing accompaniment, cutting through the richness of the pasta. Steamed broccoli or asparagus are also excellent choices for adding more greens to the plate. This dish is hearty enough for a casual family dinner but also elegant enough to serve when you have guests over. Just be sure to have extra grated Parmesan and fresh parsley on hand for a beautiful presentation.
Common Slip-Ups And How To Avoid Them
Even with a straightforward recipe like this Instant Pot Creamy Garlic Parmesan Chicken Pasta, a few common mistakes can occur. Knowing how to avoid them will ensure your dish turns out perfectly every time.
One frequent issue is getting a “Burn” notice on your Instant Pot. This usually happens when food is stuck to the bottom of the pot, preventing proper pressure buildup. To avoid this, always deglaze the pot thoroughly after sautéing the chicken and garlic. Pour in a bit of broth and use a wooden spoon to scrape up all those flavorful browned bits before adding the pasta. Also

FAQs
- Can I make these ahead? Yes—prep ahead, refrigerate, then serve when ready.
- How long do leftovers last? Store covered in the fridge for 3–4 days for best texture.
- Can I adjust sweetness? Yes—add more or less sweetener to taste.
- Can I change the fruit? Yes—swap strawberries for blueberries, raspberries, or sliced banana.